手册
- Unity 用户手册 (2019.4 LTS)
- 包
- 已验证包
- 2D Animation
- 2D Common
- 2D Path
- 2D Pixel Perfect
- 2D PSD Importer
- 2D SpriteShape
- Adaptive Performance
- Adaptive Performance Samsung Android
- Addressables
- Advertisement
- Alembic
- Analytics Library
- Android Logcat
- AR Foundation
- AR Subsystems
- ARCore XR Plugin
- ARKit Face Tracking
- ARKit XR Plugin
- Asset Bundle Browser
- Barracuda
- Burst
- Core RP Library
- Custom NUnit
- Editor Coroutines
- Google Resonance Audio
- Google VR Android
- Google VR iOS
- High Definition RP
- High Definition RP Config
- In App Purchasing
- Input System
- Lightweight RP
- Magic Leap XR Plugin
- Mathematics
- Mobile Notifications
- Multiplayer HLAPI
- Oculus Android
- Oculus Desktop
- Oculus XR Plugin
- OpenVR Desktop
- Polybrush
- Post Processing
- ProBuilder
- Profile Analyzer
- Quick Search
- Remote Config
- Scriptable Build Pipeline
- Searcher
- Settings Manager
- Shader Graph
- Subsystem Registration
- Test Framework
- TextMesh Pro
- 时间轴
- Unity Collaborate
- Universal RP
- Visual Effect Graph
- Vuforia Engine AR
- Windows Mixed Reality
- Windows XR Plugin
- XR Interaction Subsystems
- XR Legacy Input Helpers
- XR Plugin Management
- 预览包
- 2D Entities
- 2D IK
- AI Planner
- Animation Rigging
- Asset Graph
- Build Report Inspector
- Cinemachine
- Code Coverage
- Collections
- Device Simulator
- DOTS Editor
- Entities
- FBX Exporter
- Film and TV Toolbox
- Game Foundation
- Havok Physics for Unity
- Hybrid Renderer
- Immediate Window
- Jobs
- Kinematica
- 内存性能分析器 (Memory Profiler)
- MeshSync
- ML Agents
- MockHMD XR Plugin
- Package Development
- Package Validation Suite
- Performance testing API
- Platforms
- Platforms Android
- Platforms Linux
- Platforms macOS
- Platforms Web
- Platforms Windows
- PlayableGraph Visualizer
- ProGrids
- Project Tiny Full
- Streaming Image Sequence
- Terrain Tools
- UI Builder
- Unity AOV Recorder
- Unity Distribution Portal
- Unity NetCode
- Unity Physics
- Unity Recorder
- Unity Reflect
- Unity Render Streaming
- Unity Simulation Client
- Unity Simulation Core
- Unity Transport
- Unity User Reporting
- USD
- Vector Graphics
- WebGL Publisher
- WebRTC
- Xiaomi SDK
- XR Interaction Toolkit
- 内置包
- 2D Sprite
- 2D Tilemap Editor
- AI
- Android JNI
- 动画
- Asset Bundle
- Audio
- 布料
- Director
- Image Conversion
- IMGUI
- JSONSerialize
- Particle System
- 物理 (Physics)
- Physics 2D
- Screen Capture
- Subsystems
- Terrain
- Terrain Physics
- Tilemap
- UI
- UIElements
- Umbra
- Unity Analytics
- Unity UI
- Unity Web Request
- Unity Web Request Asset Bundle
- Unity Web Request Audio
- Unity Web Request Texture
- Unity Web Request WWW
- Vehicles
- Video
- VR
- Wind
- XR
- 按关键字排列的包
- Unity 的 Package Manager
- 创建自定义包
- 已验证包
- Unity 2019 中的新功能
- 在 Unity 中操作
- 安装 Unity
- Unity 的界面
- 资源工作流程
- 创建游戏玩法
- 编辑器功能
- 分析
- 升级指南
- 导入
- 输入
- 2D
- 图形
- 渲染管线
- 摄像机
- 后期处理
- 光照
- 网格、材质、着色器和纹理
- 网格组件
- 创建和使用材质
- 纹理
- 编写着色器
- 标准着色器
- 标准粒子着色器
- 旧版着色器
- 内置着色器的用途和性能
- 普通着色器系列
- 透明着色器系列
- 透明镂空着色器系列
- 自发光着色器系列
- 反光着色器系列
- 反射顶点光照 (Reflective Vertex-Lit)
- 反光漫射 (Reflective Diffuse)
- 反光镜面反射 (Reflective Specular)
- 反光凹凸漫射 (Reflective Bumped Diffuse)
- 反光凹凸镜面反射 (Reflective Bumped Specular)
- 反光视差漫射 (Reflective Parallax Diffuse)
- 反光视差镜面反射 (Reflective Parallax Specular)
- 反光法线贴图无光照 (Reflective Normal Mapped Unlit)
- 反光法线贴图顶点光照 (Reflective Normal mapped Vertex-lit)
- 着色器参考
- 粒子系统
- 选择粒子系统解决方案
- 内置粒子系统
- 使用内置粒子系统
- 粒子系统顶点流和标准着色器支持
- 粒子系统 GPU 实例化
- 粒子系统 C# 作业系统集成
- 组件和模块
- 粒子系统 (Particle System)
- 粒子系统模块
- 粒子系统 (Particle System) 主模块
- Emission 模块
- Shape 模块
- Velocity over Lifetime 模块
- Noise 模块
- Limit Velocity Over Lifetime 模块
- Inherit Velocity 模块
- Force Over Lifetime 模块
- Color Over Lifetime 模块
- Color By Speed 模块
- Size over Lifetime 模块
- Size by Speed 模块
- Rotation Over Lifetime 模块
- Rotation By Speed 模块
- External Forces 模块
- Collision 模块
- Triggers 模块
- Sub Emitters 模块
- Texture Sheet Animation 模块
- Lights 模块
- Trails 模块
- Custom Data 模块
- Renderer 模块
- 粒子系统力场 (Particle System Force Field)
- 内置粒子系统示例
- Visual Effect Graph
- 创建环境
- 天空
- 视觉效果组件
- 高级渲染功能
- 优化图形性能
- 颜色空间
- 图形教程
- 物理系统
- 脚本
- 多玩家和联网
- 音频
- 视频概述
- 动画
- 用户界面 (UI)
- 导航和寻路
- Unity 服务
- 设置项目启用 Unity 服务
- Unity Organizations
- Unity Ads
- Unity Analytics
- Unity Cloud Build
- Automated Build Generation
- 支持的平台
- 支持的 Unity 版本
- 版本控制系统
- 使用 Unity 开发者控制面板 (Developer Dashboard) 对 Unity Cloud Build 进行 Git 配置
- 使用 Unity Editor 对 Unity Cloud Build 进行 Git 配置
- 使用 Unity 开发者控制面板 (Developer Dashboard) 对 Unity Cloud Build 进行 Mercurial 配置
- 使用 Unity Editor 对 Unity Cloud Build 进行 Mercurial 配置
- 将 Apache Subversion (SVN) 用于 Unity Cloud Build
- 使用 Unity 开发者控制面板 (Developer Dashboard) 对 Unity Cloud Build 进行 Perforce 配置
- 使用 Unity Editor 对 Unity Cloud Build 进行 Perforce 配置
- 使用 Unity 开发者控制面板 (Developer Dashboard) 对 Unity Cloud Build 进行 Plastic 配置
- 发布到 iOS
- 高级选项
- 在 Unity Cloud Build 中使用可寻址资源
- 编译清单
- Cloud Build REST API
- Unity Cloud Content Delivery
- Unity IAP
- 设置 Unity IAP
- 跨平台指南
- 应用商店指南
- 实现应用商店
- Unity Collaborate
- Unity Cloud Diagnostics
- Unity Integrations
- Multiplayer 服务
- XR
- 开源代码仓库
- Asset Store 发布
- 平台开发
- 将“Unity 用作库”用于其他应用程序
- 启用深层链接
- 独立平台
- macOS
- Apple TV
- WebGL
- iOS
- Android
- Windows
- 将 Unity 集成到 Windows 和 UWP 应用程序中
- Windows 通用
- 通用 Windows 平台
- 移动平台开发者检查清单
- 实验性
- 旧版主题
- 最佳实践指南
- 专家指南
- 术语表
- Unity 用户手册 (2019.4 LTS)
- 2D
- 精灵
- Sprite Editor
- Sprite Editor:Custom Physics Shape
Sprite Editor:Custom Physics Shape
概述
Sprite Editor 的 Custom Physics Shape 用于编辑精灵的物理形状;物理形状定义了精灵 2D 碰撞体网格 (Collider 2D Mesh) 的初始形状。可以通过碰撞体的组件设置进一步优化物理形状。
要编辑精灵的物理形状,请执行以下操作:
1.在 Project 窗口中,选择要更改的精灵。
2.在 Inspector 窗口中,单击 Sprite Editor 按钮。
3.在 Sprite Editor 窗口中,选择左上角的下拉菜单,然后选择 Custom Physics Shape。
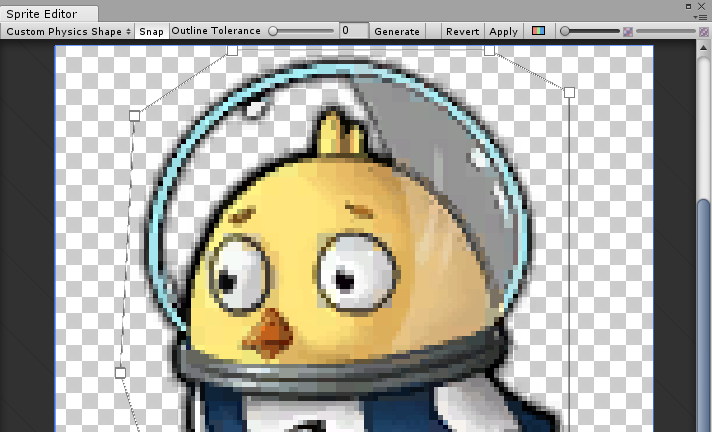
属性
| 属性 | 功能 |
|---|---|
| Snap | 将控制点贴靠到最近的像素。 |
| Outline Tolerance | 使用此属性可控制生成的轮廓贴合精灵纹理轮廓的紧密程度。在最小值 (0) 时,Sprite Editor 会在精灵周围生成基本轮廓。在最大值 (1) 时,Sprite Editor 生成一个尽可能贴合精灵像素轮廓的轮廓。 |
| Generate | 单击可自动创建物理形状轮廓。 |
标准工作流程
首先打开所选精灵的 Sprite Editor。然后,从 Editor 的左上角下拉菜单中选择 Custom Physics Shape。
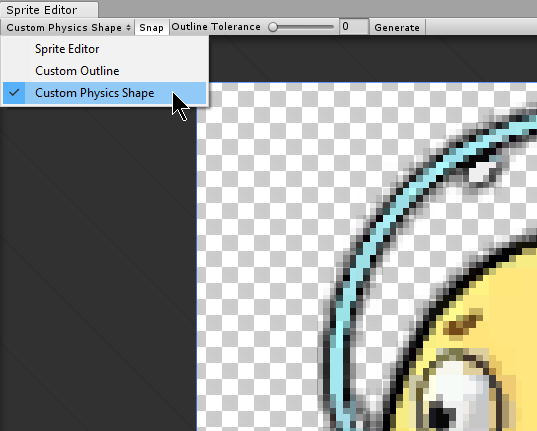
然后单击 Generate 创建物理形状的轮廓。默认情况下,Unity 会生成贴合原始精灵纹理形状的轮廓,并会考虑透明区域。
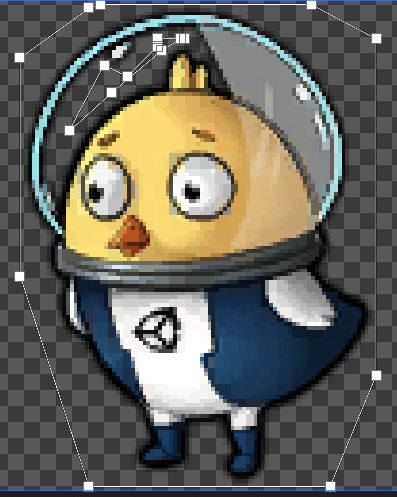
调整 Outline Tolerance 滑动条可优化物理形状的轮廓。调整 Outline Tolerance 值后,单击 Generate 可刷新轮廓。

单击并拖动每个控制点可优化物理形状的轮廓。要删除控制点,请选择控制点,然后按 Command+Del/Del 键。

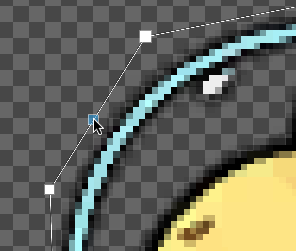
当鼠标悬停在轮廓上时,边缘上会出现透明控制点。单击即可在该位置创建新控制点。选择控制点并按 Del/Command+Del 键,即可删除控制点。
 |
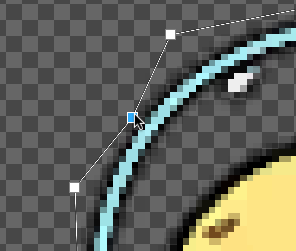 |
| Fig.1: Transparent control point. | Fig.2: Click to create new control point. |
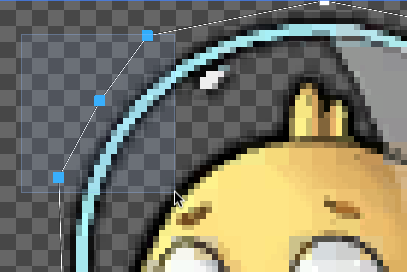
单击并拖动一个区域可选择多个控制点。在选择多个控制点后可以将它们一起放置在某个位置或将它们全部删除。
按住 Control/Ctrl 键可以选择边缘而不是控制点。单击突出显示的边缘可以将它们拖动到新位置。
 |
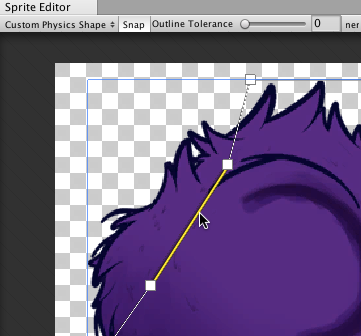 |
| Fig.1: Select the edge of the outline. | Fig.2: Drag and move the edge freely once selected. |
使用多个轮廓
单个物理形状可以包含多个单独的轮廓。如果只有精灵的特定区域需要 2D 碰撞体网格 (Collider 2D Mesh) 进行碰撞,这将非常有用。例如,作为游戏机制的一部分,可能希望角色仅响应其精灵特定区域上的碰撞以实现损坏效果。
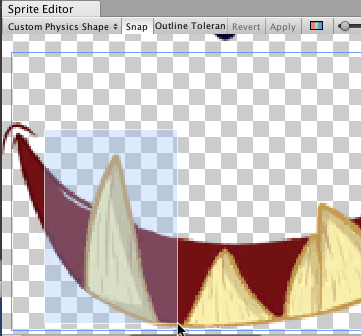
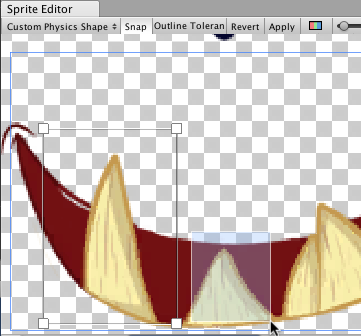
在 Sprite Editor 窗口中单击并拖动任何空白区域,可创建包含 4 个控制点的新矩形轮廓。重复此步骤可以创建更多轮廓。可使用与单个物理形状轮廓相同的方式优化每个轮廓。
 |
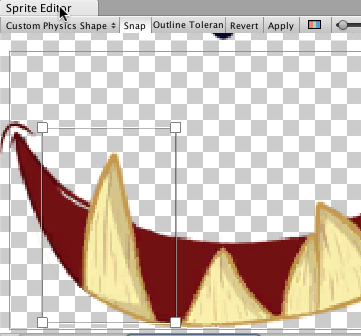 |
| Fig. 1: Click and drag to create 4-point box. | Fig. 2: Box physics shape with 4 control points. |
 |
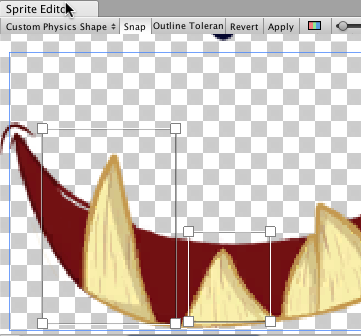 |
| Fig. 3: Click and drag again for another box. | Fig. 4: Repeat to create more separate outlines. |
更多提示
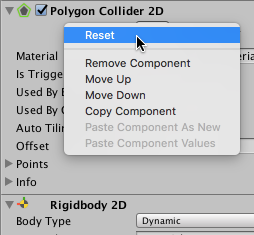
如果编辑了现有游戏对象正在引用的精灵的轮廓,请右键单击 Collider 2D 组件的标题,然后选择 Reset。此时将更新 2D 碰撞体网格的形状。
2018–05–24页面已发布